Do-It-Yourself (DIY) Water Infiltration Test
Try this do-it-yourself water infiltration test.
Download the PDF file now:
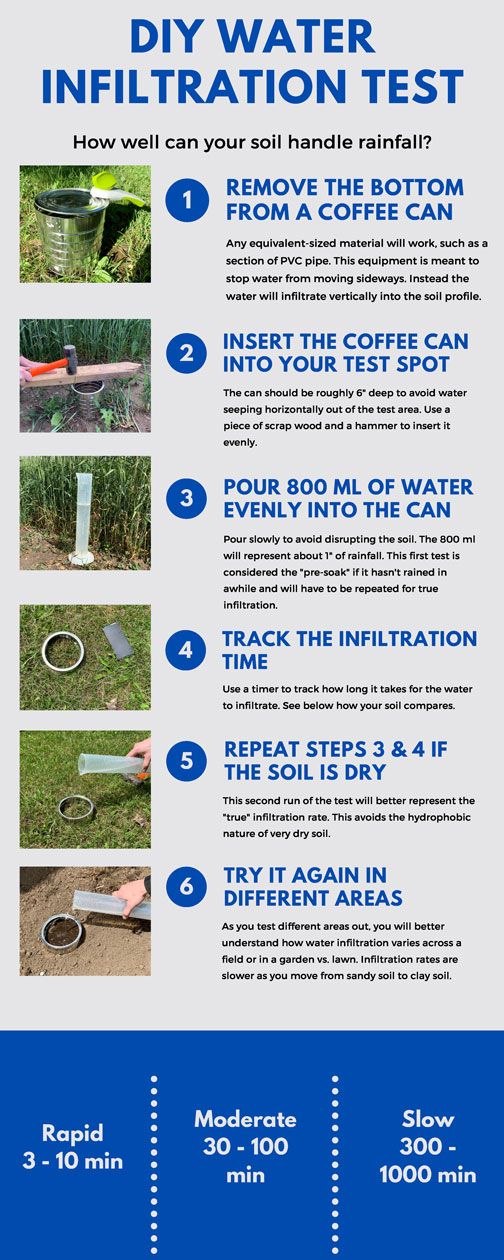
REMOVE THE BOTTOM FROM A COFFEE CAN
Any equivalent-sized material will work, such as a section of PVC pipe. This equipment is meant to stop water from moving sideways. Instead the water will infiltrate vertically into the soil profile.
INSERT THE COFFEE CAN INTO YOUR TEST SPOT
The can should be roughly six inches deep to avoid water seeping horizontally out of the test area. Use a piece of scrap wood and a hammer to insert it evenly.
POUR 800 ML OF WATER EVENLY INTO THE CAN
Pour slowly to avoid disrupting the soil. The 800 ml will represent about 1" of rainfall. This first test is considered the "pre-soak" if it hasn't rained in awhile and will have to be repeated for true infiltration.
TRACK THE INFILTRATION TIME
Use a timer to track how long it takes for the water to infiltrate. See below how your soil compares.
REPEAT STEPS 3 & 4 IF THE SOIL IS DRY
This second run of the test will better represent the 'true' infiltration rate. This avoids the hydrophobic nature of very dry soil.
TRY IT AGAIN IN DIFFERENT AREAS
As you test different areas out, you will better understand how water infiltration varies across a field or in a garden vs. lawn. Infiltration rates are slower as you move from sandy soil to clay soil.